


How to install an Inscreed Cable System

Underfloor heating used to be a luxury for the wealthy, but these days with the introduction of Electric Underfloor heating, almost anyone can feel the warmth on their feet.
This guide will be the first in a series of HOW-TO’s with regard to underfloor heating and how to install.
While there are plenty of suppliers of this type of product, these articles will concentrate on Warmup Electric Underfloor heating systems.
Warmup supply a varied amount of products depending on the needs of the individual user, each article in this series will focus on a different system.
Inscreed Cable System
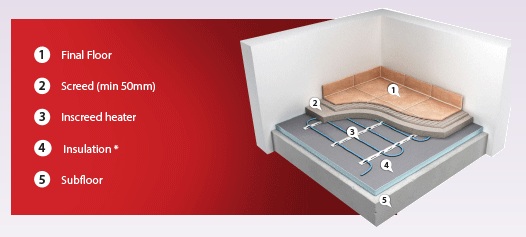
 The cable has been designed to be installed within a cement screed of at least 50mm thickness.
The cable itself has an earth shielded twin conductor running through the 6mm thick cable.
The system has a cold tail of approximately 3 metres to enable the user/installer to connect the system to a thermostat.
This has been designed to connect to a 230 volt electrical supply, which can produce between 100 and 200 watts per m² of heating depending on the spacing of the wire.
Here, at Atlas Ceramics, we recommend the use of Warmup Insulation Boards for all underfloor heating projects – not only because they can lower running costs by up to 50% but because they cut the heating time from over 2.5 hours to just 20 minutes.
Tools/Products required:
- Insulation Boards (we recommend 10mm thickness)
- A Warmup Inscreed Cable system that meets your requirements
- Warmup Fixing bands and/or Fixing Tape
- A Suitable Thermostat.
- A flexible Levelling Compound.
- A Mixer for the Levelling Compound.
- Hand tools for spreading the compound (if necessary)
Preparation:
It is suggested that rather than ‘going in all guns blazing’, getting the job done quickly and something not being right at the end – that a checklist is created to track progress and that a floor plan is used illustrating the placement of the thermostat, the approximate place for the sensor probe and also the cable system.
Fixing Bands:
These products are designed to be fixed to the insulation or concrete floor to ensure there is little movement to the system, when the screed is applied.
When fixed to the surface, they will need to be laid in a perpendicular direction to that of which the cable will be laid.
The bands need to be placed across the floor at intervals of 0.75 metres, with a border of 100mm left clear around the room. It is best practice to fit these bands using an adhesive or fixing nails.
If the shape of the area in which you are installing the system is peculiar, it is advisable that the fixing tape is used.
This way you can get complete coverage of the room. Please note that Warmup recommend using 1 metre of fixing tape for every 6 metres of cable.
Now that the fixing bands are in place, it is time to lay down the cable.
The Cable:
The cable needs to be laid up and down the room and clipped into place on the fixing bands. This aids the restriction of movement from the cable when the screed is laid over it.
The cable should be spaced at even intervals (it is recommended that the gap between the cable should be no less than 50mm) at all times to ensure that the floor will receive an even heat when in use, the installer will also need to make sure that the cable is not cut, does not touch or cross another part of the cable – this is because it can cause overheating and damage the system.
The cable has now been laid and is secured within the fixing bands. It is now time to fit the stat.
The Thermostat:
 It is recommended that the thermostat be installed by a Qualified Electrician who is also Part P certified. For more information on what Part P Certification is, please go to the Electrical Safety Council website.
Once this has been completed the system as a whole will need to be tested to ensure everything is still working as it should prior to the application of screed (of which needs to be a minimum of 30mm thickness).
Finally it is suggested by Warmup that the sensor probe be installed within the top 10mm of screed, either by placing it directly into the compound or by using a flexible conduit.
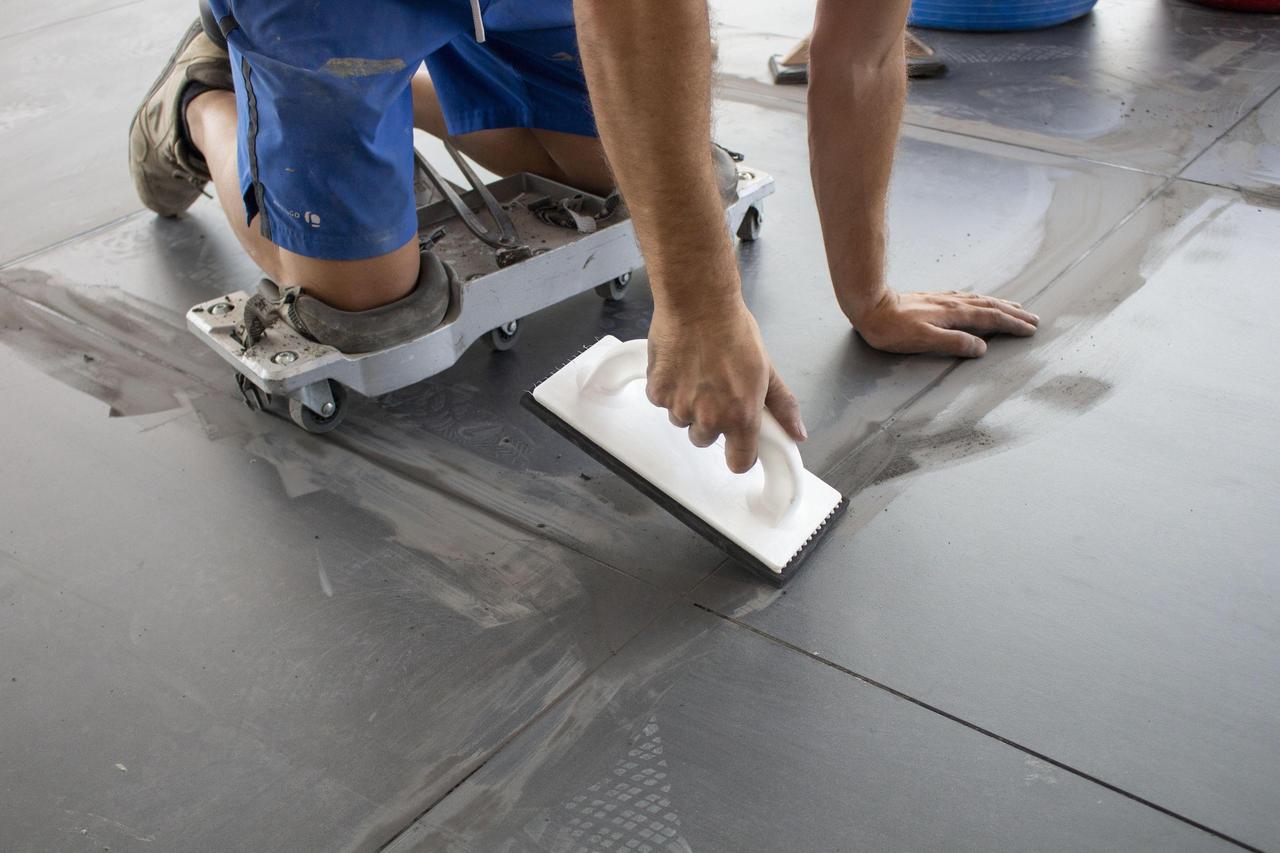
Once screeding is complete – it is advisable to test the product again to ensure that nothing has gone awry. Please note – for all underfloor heating systems – a flexible screed/compound is required. At Atlas, we recommend Weber Floor Flex.
After this further testing has been carried out – allow the screed to dry fully before using the system. This drying process can take anything from 7 to 28 days.
For more information on this topic – or if you have any specific questions please feel free to get in touch with one of the Atlas team – by phone (01425) 621173, by email at info@atlasceramics.co.uk or through our Social Media channels ( Facebook and Twitter ).
Share this article
Article by Mike Lovatt
Here at Atlas Ceramics we import and distribute high quality products to support the tiling industry. These products include Polished tiles, Matt tiles or Satin tiles for the wall and floor, ceramic and porcelain tiles, natural stone and mosaics, from Italy, Portugal, and Spain.